

Easiest Way to Make Perfect Yomogi Shiratama Yomogi Dango For Beginners
Easiest Way to Make Perfect Yomogi Shiratama Yomogi Dango For Beginners Delicious, fresh and tasty.
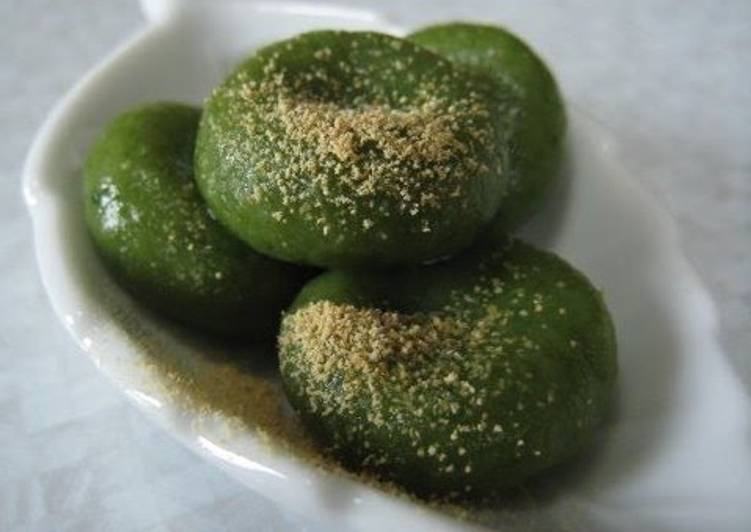
Yomogi Shiratama Yomogi Dango For Beginners. For the yomogi, pick the young sprouts which the back of the leaf is white and soft. It is a bit of work to chop, so I take off the soft stem too. Shiratama Dango are often served in a bowl or included in other Japanese desserts called wagashi (和菓子, Japanese confectionery) You will need to use yomogi (for green) and red color to make three colors though.
This glutinous rice flour is made from mochigome (もち米/糯米) and it's.
Great recipe for Yomogi Shiratama Yomogi Dango For Beginners.
Enjoying the yomogi which I picked when I went for a walk with a standard taste.
You can have Yomogi Shiratama Yomogi Dango For Beginners using 5 ingredients and 10 steps. Here is how you achieve that.
Ingredients of Yomogi Shiratama Yomogi Dango For Beginners
-
You need 1 of hand full of one hand Yomogi.
-
It’s 3 tbsp of Shiratamako / Dangoko.
-
Prepare 20 ml of Water.
-
Prepare of To taste.
-
You need 1 of Kinako.
You can enjoy it from just a little amount.
Some content is for members only, please sign up to see all content.
Kusa dango or Yomogi dango (草団子 or よもぎ団子) is mixed leaves of Yomogi, like Kusa mochi.
It is often covered with anko.
Yomogi Shiratama Yomogi Dango For Beginners step by step
-
For the yomogi, pick the young sprouts which the back of the leaf is white and soft. It is a bit of work to chop, so I take off the soft stem too..
-
Boil the yomogi. The young sprouts which you can get until May is less bitter, so add a pinch of salt and boil for 1 minute. For the ones which is not a young sprout, add baking soda but add just a little bit..
-
Soak in water to fix the color. Then squeeze and mince. You wouldnt be able to cut the small fibers so it will feel like you have a paper spread underneath..
-
Grind using a mortar. If you do Step 3 carefully, this process will be done in no time. There would be some fibers left but never mind about the small ones..
-
Cut corners here. Add flour in the mortar. Add water little at a time and adjust..
-
Knead all the yomogi even from the ditch and let it become as soft as earlobes at the end. Then you will have a green paper clay ready..
-
Round it and make a little dent..
-
Drop into boiling water. When it comes floating up to the surface, boil for 1 minute and then take them out. It will be even better if you adjust the fire level to be like boiling (medium heat) and floating (low heat)!.
-
Put in cold water. It is difficult to see in this picture, but the color will be more green than at Step 6 and 7..
-
Enjoy with the flavor you like, such as roasted soy beans flour (Kinako) It would be more fancy it you top it with ice cream. It is also possible to freeze. Defrost by boiling..
Yomogi is the name for Japanese mugwort, specifically Artemesia princeps.
I have mugwort growing in my backyard, but it's actually Artemesia vulgaris.
Yomogi is what gives mochi and wagashi that particular dark green color.
Download royalty-free Traditional japanese sweets on the plate.
Asian." can be used for personal and commercial purposes according to the conditions of the purchased Royalty-free.