

Easiest Way to Cook Delicious Restaurant Style Thick and Creamy Tenshin-Don ♪
Easiest Way to Cook Delicious Restaurant Style Thick and Creamy Tenshin-Don ♪ Delicious, fresh and tasty.
Restaurant Style Thick and Creamy Tenshin-Don ♪. Plz support my effort and show your love by subscribing to my. I don't typically use fat-free anything in my kitchen but yogurt typically gets the green light. If you get a chance to try this Thick and Creamy Restaurant-Style Tzatziki Dip, let me know!
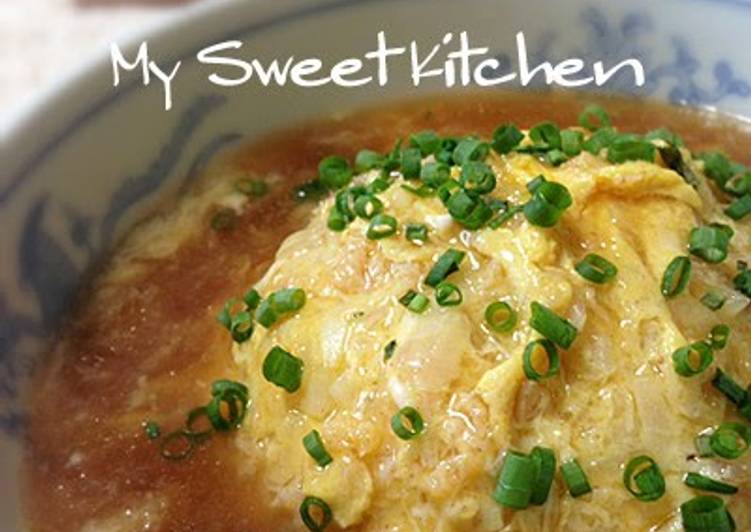
The final addition is a thick sauce that is generously poured over the dish.
Today it can be found in many Japanese restaurants, and is commonly prepared as a quick and nutritious homemade meal.
Casual dining restaurant is between fast casual and fine dining restaurant.
You can have Restaurant Style Thick and Creamy Tenshin-Don ♪ using 15 ingredients and 24 steps. Here is how you achieve it.
Ingredients of Restaurant Style Thick and Creamy Tenshin-Don ♪
-
It’s 2 of Eggs.
-
Prepare 200 ml of A. Water.
-
It’s 1/2 tsp of A. Weipa.
-
Prepare 1/2 of to 1 teaspoon A. Soy sauce.
-
You need 1/2 tsp of A. Oyster sauce.
-
It’s 1/2 tsp of A. Sake.
-
Prepare 1/2 tsp of A. Mirin.
-
Prepare 1 of just a tiny bit A. Grated garlic.
-
It’s 1 of bit less than 1 tablespoon A. Sesame oil.
-
Prepare 1 of Salt and pepper.
-
Prepare 2 tsp of to 1 tablespoon Katakuriko.
-
Prepare 1/6 of Onion.
-
Prepare 1 of Shrimp, canned crab, crabsticks, or whatever you like (I used canned crab).
-
Prepare 1 of Green onions or leeks of your choice (white leek, green onions, etc.).
-
You need 1 of rice bowl full White cooked rice.
These kinds of restaurants have a large alcohol menu, which includes different type of beers and wines with sidebar and bar staff.
The portion size is usually large.
Don't miss the full recipe and more amazing pictures from Family Style Food, right over here.
It's a big world but it's hard to find a chef more accomplished than Eric Ripert.
Restaurant Style Thick and Creamy Tenshin-Don ♪ instructions
-
Chop the onion finely. If you are using large shrimp, cut into 2-3cm pieces..
-
Break the eggs into a bowl, add salt and pepper and beat..
-
Dissolve the katakuriko in twice the amount in water. If you prefer a thicker sauce, use 1 tablespoon of katakuriko..
-
Put all the A. ingredients in a pan and heat. Taste and add salt and pepper. Bring to a boil..
-
I use Weipa soup stock base, but if you dont have this use another chicken soup stock base and make 200 ml of soup with it..
-
When the step 4 sauce has come to a boil, stir with a ladle while you add the step 3 katakuriko dissolved in water little by little to make the ankake sauce..
-
Once you have a smooth, lump-free sauce, turn the heat off right away. *If you let it simmer for too long and it gets too salty, add a little water to adjust..
-
Put a generous amount of sesame oil in a frying pan, stir fry the Step 1 ingredients quickly and season with salt and pepper. Here I used shrimp..
-
Put the stir fried ingredients into the beaten egg from Step 2 oil and all, and mix well. If you are using canned crab, just stir fry the onion and add the crab, can liquids and all, into the beaten egg..
-
Crabsticks are treated like canned crab - just add them to the egg rather than stir frying them. By adding the oil that you stir fried the onion in, itll be easier to make fluffy light scrambled eggs later..
-
Put 1 rice bowl full of white cooked rice in the serving dish or bowl. You can moisten a rice bowl, pack it tightly with rice and invert it on a plate - this makes a nice neat presentation..
-
Add some more sesame oil to the frying pan you used in Step 9, and heat until its smoking..
-
At the same time, start re-heating the ankake sauce from Step 7 over low heat..
-
When the frying pan is very hot, add the Step 9 egg mixture all at once, and rapidly mix it up from the center with cooking chopsticks to cook..
-
When the egg is soft-set (the whites should be semi-translucent) slide it out of the frying pan right onto the rice..
-
The cooking time for the egg depends on how hot your cooktop can get, but it takes me about 15 seconds. Put the egg on the rice when it looks like the photo..
-
The inside is still liquid in step 16, but it will become nice and creamy very soon with residual heat. By just putting it on the bed of rice, it will form a nice rounded shape..
-
Pour the heated up ankake sauce from Step 13 over the egg, top with chopped green onion or leek, and its done..
-
It may seem like theres too much ankake sauce to start. But it's just the right amount for 1 adult sized bowl of rice..
-
If you are from the Kanto (Tokyo) region and you just have to have vinegar in the sauce, add 1 tablespoon of rice vinegar. These days I like either version..
-
This is a related recipe:"Our Golden Ratio ♪ Thick Ankake Sauce For Crispy Chinese Noodles and Chinese-Flavored Rice Bowls". If you like this Tenshin-don recipe, please give that one a try too.
https://cookpad.com/us/recipes/152544-thick-ankake-sauce-for-crispy-noodles-and-rice-bowls.
-
If you like eggs, try"Non-oil: Hotel style scrambled eggs" too if you like…its soo easy..
-
Arent egg based rice bowls so delicious? TryOur Golden Ratio for Egg Rice Bowls or Oyako (Chicken and Egg) Rice Bowls.
https://cookpad.com/us/recipes/155993-chicken-egg-or-pork-cutlets-rice-bowl.
- "Our Familys Golden Ratio ♪ Delicious and Authentic Chilled Chinese Noodles". is part of my "Chinese-style cooking at home" series.
His restaurant Le Bernardin has received four stars from The New York Times We absolutely love that rich, thick Greek-style yogurt, especially for mid-afternoon snacks and quick desserts.
Let this sit in your fridge for anywhere from a half an hour to overnight, depending on how thick you want the yogurt.
After a few hours, our yogurt was thick enough to spread on toast like.
Thick, creamy, fresh homemade yogurt has never been easier.
However, you def don't need an instant pot to make homemade yogurt.